I have been enjoying my
Smoke Hollow smoker/grill/gas grill since I bought it this summer.
I've used it mostly for grilling because there were a few
modifications I wanted to make to improve the smoker capabilities.
It's not that the smoker
part is defective. I would recommend this smoker/grill to the back yard griller. But it has been my experience that ANY smoker under
$500 is going to require home brewed innovations to improve their
performance. For example, horizontal smokers like the CharGriller need standard mods as do Brinkmann vertical smokers.
Here is what I did to my
Smoke Hollow smoker in the past week.
[The thought occurs to me that modifying and fabricating your cooking equipment is pretty specific to grilling/smoking. When is the last time you heard about someone modifying their oven or altering their stand mixer? I think it adds a level of personal involvement in our cooking.]
Issue 1:
Air gaps
between lids of the cooking chamber and fire box. It might not look
that bad, it's only 1/8th inch, right? But considering
the distance around the lid, that is equivalent to having a 10.25
square inch hole in your smoker. This causes heat loss, inconsistent
temperatures, and increased fuel consumption.
Solution: Install a
gasket. I used a Nomex gasket for a Large Big Green Egg.
 |
| Clean the edges with Goo Gone, then mineral spirits and let dry 30 minutes. |
 |
| Cut gasket to size. |
 |
| Affix with 3m 77 spray adhesive but brush it on instead of spraying. |
After installing the
gasket, shut the lids, loosen the hinge screws, align the lid and
re-tighten the screws.
UPDATE:
The seal gasket worked great for use as a smoker but after the third or fourth time of GRILLING instead of smoking, the higher temps loosened the adhesive on the cooking chamber. Another Smoke Hollow owner, Nic, and I were discussing this as it progressed and he used a more successful solution as follows:
The seal gasket worked great for use as a smoker but after the third or fourth time of GRILLING instead of smoking, the higher temps loosened the adhesive on the cooking chamber. Another Smoke Hollow owner, Nic, and I were discussing this as it progressed and he used a more successful solution as follows:
It worked really well. I ended up doing the main grill area first then I decided to do the fire box as well. I did this because I turned the grill into a cold smoker to smoke salmon. It worked super well. Keeps the smoke to a nice 75 degrees. The unit holds smoke and heat well now. I used a high temp nomex gasket and used a high temp Rutland gasket sealer (the black one). I cut the gasket in half, sanded the lower part to ruff it up then applied the cement glue. The. I dampened the gasket and stuck it down let it dry for two hours then I fired the grill very hot for an hour ish and it cured great. I also did the jb weld thing which also regulates heat well. The grill does well but for hot smoking it can get a little over heated if not careful. Happy thanks giving


Nic T

Ps
It makes a great cold smoker, just get a flange and some four inch ducting and a old BBQ and a electric coal starter
Issue 2:
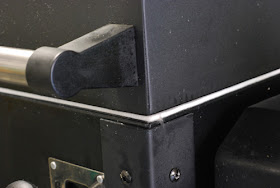
Air gaps due to
use of “spot welds” in the construction of the fire box.
 |
| All 4 corners need attention. |
 |
| Yes, that is daylight coming through the corner. |
Solution: Seal the air
gaps using JB Weld like caulk. It handles the high temps of the fire
box with ease.
 |
| That is JB Weld coming through the seam. No more air gaps. |
 |
| JB Weld fills the gap and handles the heat. |
Issue 3:
Chimney exhaust
allows hot smoking gasses to escape unevenly.
Solution: Extend chimney
down to the level of the cooking grate. This will create even temps
in the cooking area by keeping in the hot cooking gasses until they
even out at the grate level.
I just rolled up some
metal flashing, stuck it into the chimney. The flashing will try to
unroll, holding it in place.
Issue 4:
No charcoal
tray. There tray is meant for split logs only.
Solution: I added a
standard charcoal grate purchased at Lowes.
I did a test burn last
night and the smoker worked noticeably better. There was minimal
leakage and the temps held steady. Today I have been smoking chicken
and have maintained 250f rather easily.
 |
| Look Ma.....no leaks! |
 |
| Don't expect that gasket to stay white for long..... |
I did have two of the strips come loose during cooking HOWEVER, one was taken off and reattached during the install and the other I sprayed the adhesive instead of brushing it on. I'll re-clean those two sides and re-do the adhesive properly.
Next Steps: Get a
charcoal basket built for the fire box. Add a 3/8” plate to the
bottom of the fire box to reinforce it and add thermal mass. Get a rain cover so I can keep this out on my deck with my two Big Green Eggs.
Giveaway Winner
The winner of a copy of Rick Browne's 1,001 Best Grilling Recipes is Dirk.
Dirk I will
contact you directly to arrange shipping. Thanks to Agate Surrey for
hosting the giveaway of this recipe packed grilling book.


